Flashing down a brand new NAE down to version 9.0

In this Blog I am explaining how to flash a brand new NAE 55 down to Metasys version 9.0. This is very useful when you have an existing Site where the Server is at version 9.0. If you have an NAE at a greater revision than the Server, the NAE must be flashed down (or downgraded) to the same or lower revision than the Server.
Hardware/Software Revisions
For this example I used the following hardware/software and with their corresponding versions:
- NAE: MS-NAE5510-3 S/W Ver. 11.0 (11.0.0.1281)
- Windows 10 Pro, 64-bit Operating System
- NAE/NIE Update Tool Version 13.2.0.348
- Engine Image: NAE55-NIE55_9.0.5.7692
Preparation
Start by unboxing your Network Automation Engine (NAE), connecting its data protection battery first, and second, applying 24 VAC to it.
Note: You should connect a permanent 24 VAC power to your new NAE right after installing the battery”
Connect your NAE directly (without using a network switch or router) to your computer or Laptop using a regular ethernet cable (CAT5). I have not tried with crossover cable.
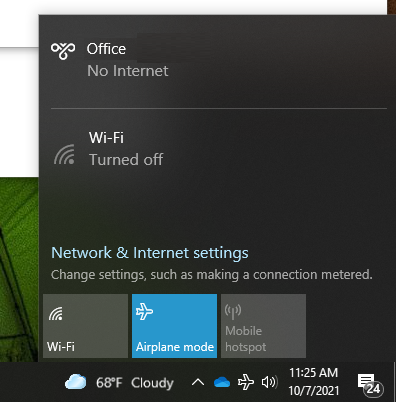
Start by turning Off your Connections
1. Make sure your computer is in Airplane Mode. Click on the WiFi symbol under the Windows taskbar.

2. Click on Airplane Mode. This will disable all wireless connections.
3. Open Windows Defender Firewall. In the Window Search bar type “Defender” and click on “Windows Defender Firewall”. Make sure you do not open “Windows Defender with Advanced Security”

4. Click on “Turn Windows Defender Firewall on or off”.

6. In the Window Search bar type “Network” and click on “Network Status”.

7. Click Change adapter options.

8. Double click on your primary network (usually “Ethernet”).

9. Click Properties.

10. Select Internet Protocol Version 4 (TCP/IPc4) and click on “Properties”.

11. Change IP settings as shown below, and click OK.

12. Close all windows.
Installing NAE Image Files
The following steps apply if you don’t have your NAE image files installed on your computer yet.
For this example, I am flashing my NAE-5510-3 11.0 down to 9.0, specifically to 9.0.5.76.92. You may flash it to the available image you have or the exact version you need.
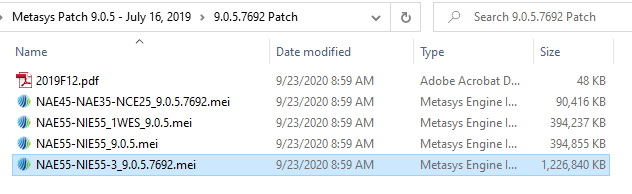
For my case, my NAEs is a “-3” so I am using the mei file in bold in the table below:
| NAE45-NAE35-NCE25_9.0.3.7679.mei | This contains images for NAE45, NAE35, NIE49, , NIE39, NCE25, and NIE29. |
| NAE55-NIE55_1WES_9.0.3.mei | This contains images for NAE55-1 and NIE5x-1 (Notice the “_1” in the file name). |
| NAE55-NIE55_9.0.3.mei | This contains images for NAE55-2 and NIE5x-2. |
| NAE55-NIE55-3_9.0.3.7679.mei | This contains images for NAE55-3 and NIE5x-3 (Notice the “-3” in the file name). |
I start by double clicking on my image installation file I need.
Once I install the file image files, the files get installed in the following path.

Starting the Flash with the NAE Update Tool
13. Under the Windows Search bar type “nae update” and click on “NAE Update Tool”.

14. Select your Ethernet Adapter. The one that you changed to 192.168.1.1, and where the NAE is connected to. If you don’t see it, probably your NAE is not powered On or you connected the NAE to the wrong port of your computer.

15. NUT Tool Opens. There will be a message warning that certain ports must be opened. Steps 16.x. will guide you through to check for those ports, but you may skip this step if you know there will not be a conflict with ports, and skip to step 17.

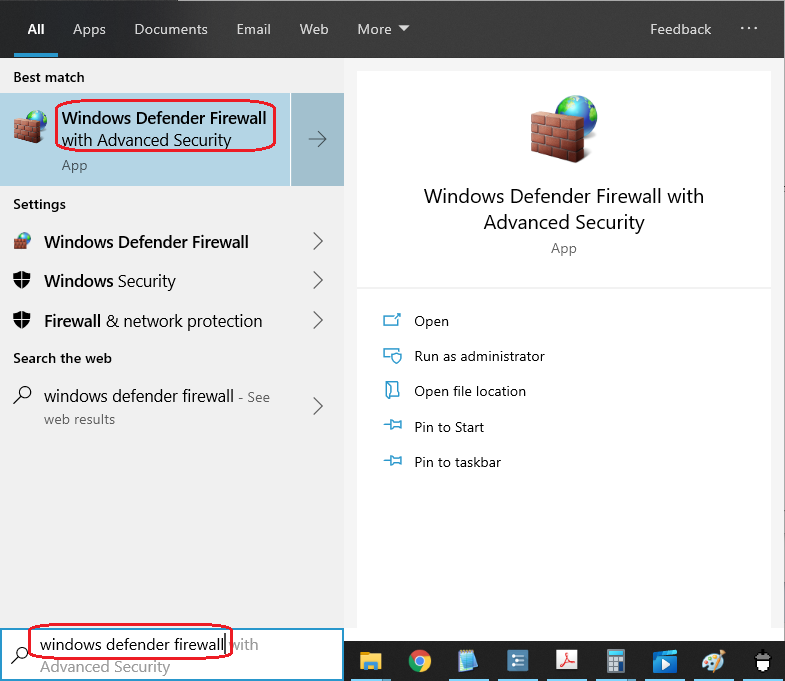
16.a. You can check the ports by typing “windows defender firewall” under the Windows Search bar and click on “Windows Defender Firewall with Advanced Security“.
16.b. Click on “Inbound Rules” and look for NAEUpdateTool.
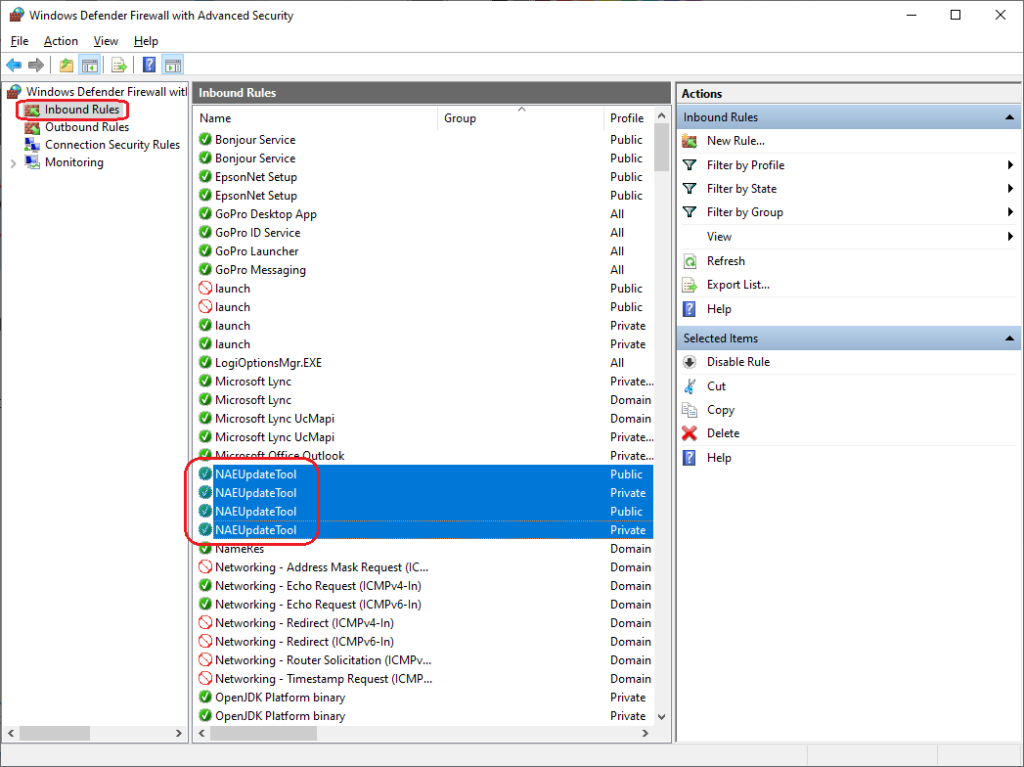
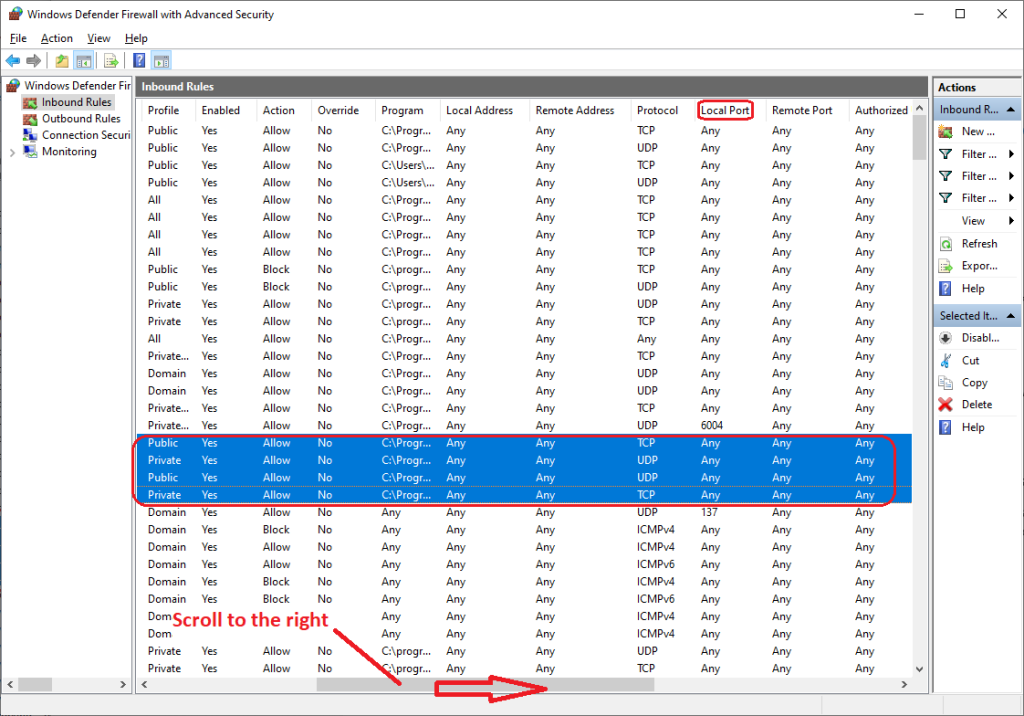
16.c. Check that Ports are set to “Any” and settings are the same as below (By default they are):
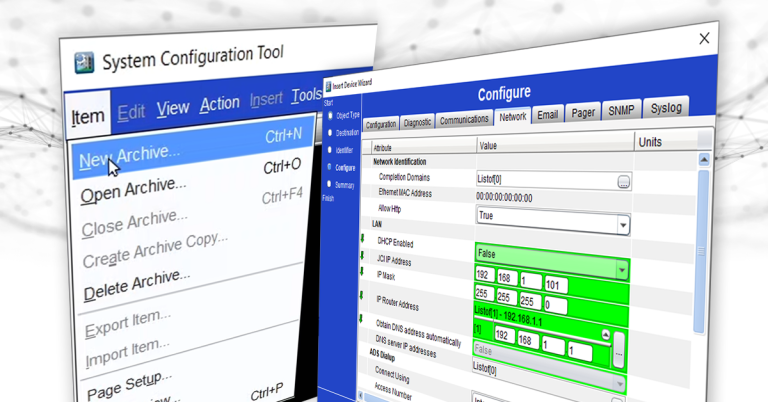
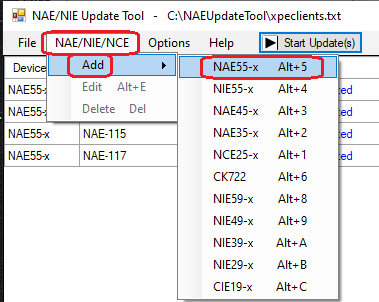
17. Coming back to the NUT Tool, let’s add our new NAE. Click NAE/NIE/NCE > Add > NAE55-x.
18. A new window with General Settings will open.
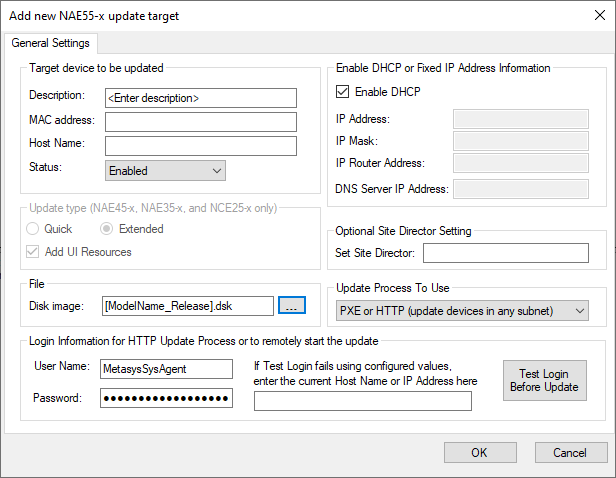
18. A new window with General Settings will open.
Description: Optional
MAC address: You can find this on a sticker on your NAE or if you double click on your NAE in Metasys, click on “Network” tab, and it’s the one under “Ethernet MAC Address”.
Host Name: The name you want to give your NAE.
Status: Enabled
Enable DHCP: Uncheck
IP Address: 192.168.1.# where # can be anything from 2 to 255.
IP Mask: 255.255.255.0
IP Router Address: 192.168.1.1
Update Process To Use: PXE Only
Disk Image: See second image below.
For this method, ignore the following: User Name, Password, and Test Login Before Update button.

Disk image:
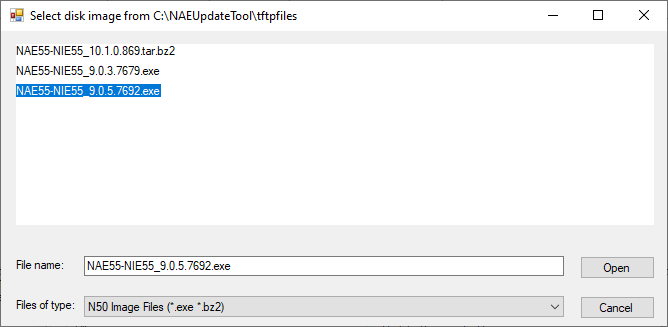
Please note that depending on your NxE MAC address, the “Files of type” above will automatically change to the extension files you engine needs (e.g. *.exe, *.bz2 for NAEs -3, and *.dsk for NAEs -1). So make sure you install the right image file on your computer it appears on the above window.
19. Once you click OK, your new NAE will be added to the queue.
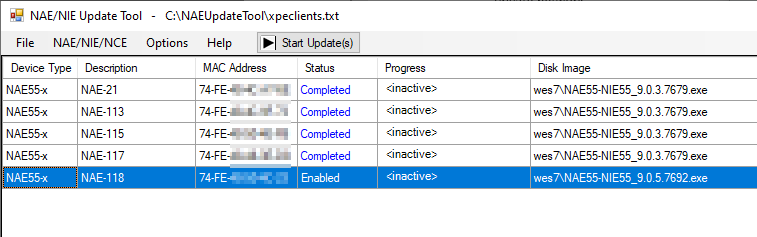
20. You can either (#1) select your NAE and click “Start Update(s)”, which sometimes doesn’t work, or (#2) disconnect the NAE from power, wait for proper shutdown, and as soon as you power it back On, the update will start after a few seconds.

You will see under the Progress box field a blue bar with description of the current progress.

The NAE will shutdown and restart a few times during this process.
21. Here is a secret: you can click under details a window will open showing details of the whole process.
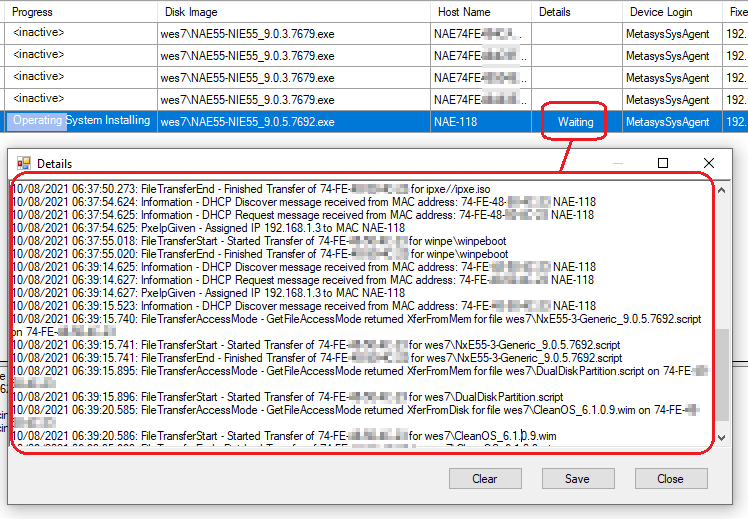
22. At some point under this Details window you will see an expected time of completion, which is very handy.

22. At some point under this Details window you will see an expected time of completion, which is very handy.
AT THIS POINT YOU ARE DONE. DO NOT FORGET TO RE-ENABLE YOUR WINDOWS DEFENDER FIREWALLS AND WI-FI.
Login into Your Flashed NAE
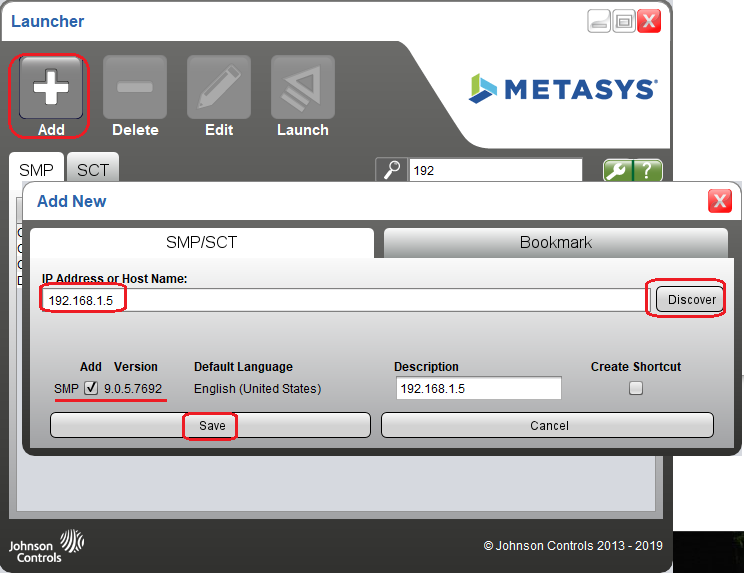
24. Start by Launching your Metasys Launcher.
- Click on the big plus sign (+) to add your NAE.
- Type your NAE new IP address (the one in step 18: 192.168.1.5).
- Click Discover.
- Add a description if you want.
- Click Save
25. Now select your NAE and click Launch.

26. Use the default NAE credentials. You will be asked to update your password right away:
Username: metasyssysagent
Password: ChangeThi$Pa$$w0rdN0w!
27. Change your password making sure you don’t use the blocked words.
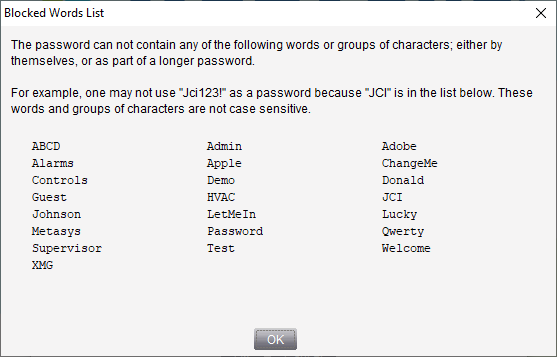

28. If you were able to create a complex password using the above instructions you will be good to go. Click OK and accept terms.

You are in!
Important Login Credential Settings
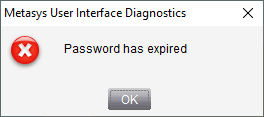
The first time you login to a brand new NAE (or flashed NAE) I recommend updating your administrator credentials so your passwords does not expires unexpectedly, or your account doesn’t become dormant after a year.
29. Go to Tools and click Administrator…

30. Double click on MetasysSysAgent.

31. Under Account Policy, check the following.

Changing your NAEs IP Address:
f you want to change your NAE’s IP address just double click on your NAE, click on Network tab. Then click on Edit, change your IP settings, and save your changes

The NAE will restart and you may need to change the IP settings on your laptop so you are on the same subnet as your NAE.
Thank you.